Code Module
The Code module is designed to assist software development professionals by leveraging generative AI to streamline code snippet generation, subtask creation, and documentation. This enhances efficiency, allowing developers to focus on core tasks.
Getting Started: Setup Configuration
Before using the Code module's features, you must first create a Setup. The Setup defines the context for your project, including the project, development stack, and profiles.
Creating a New Setup
-
Navigate to Setup: Go to the "Setup" page to see a list of existing configurations or create a new one.
-
Initiate Creation: Click the "Create Setup" button to begin.
-
Select a Project: Choose a project from your organization's board. This is a mandatory step.
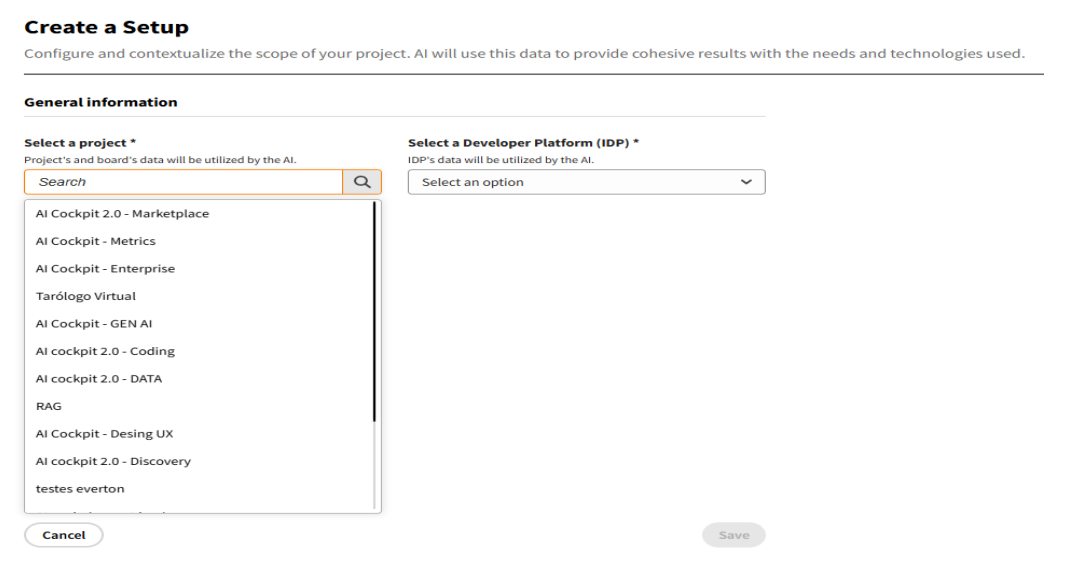
-
Define the Development Platform: Select "configure manually" for now. Future updates will include predefined platform configurations. This will reveal the "Stack" and "Profile" fields.
-
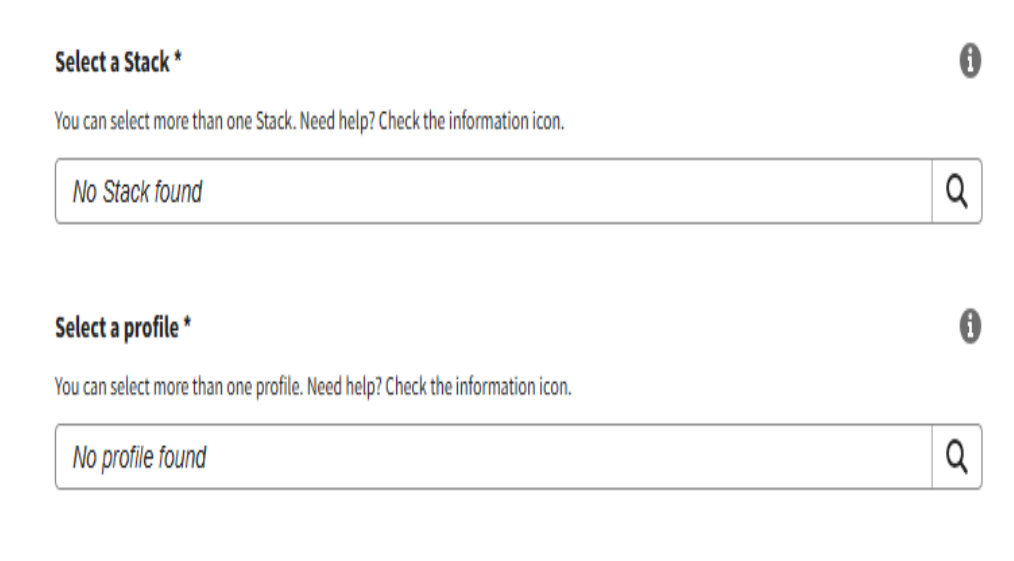
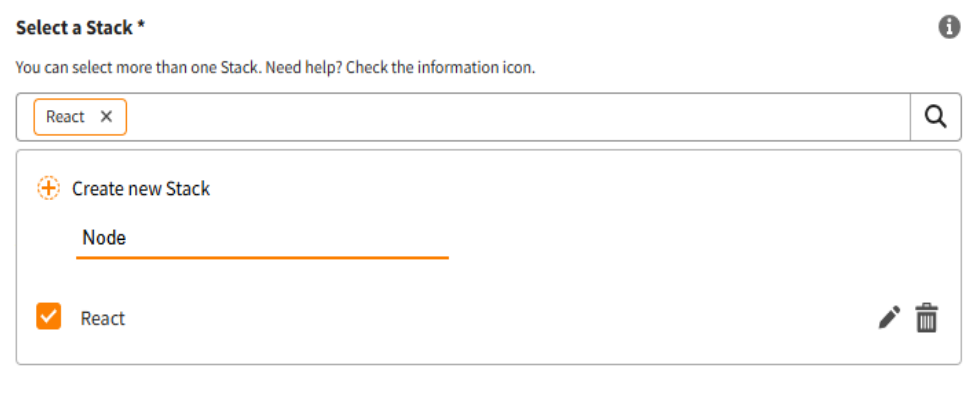
Create and Assign Stacks:
- Click the magnifying glass and then "Create New Stack."
- Enter a name for your stack (e.g., "React," "Node.js") and press "Enter."
- You can add multiple stacks and edit or remove them as needed.
-
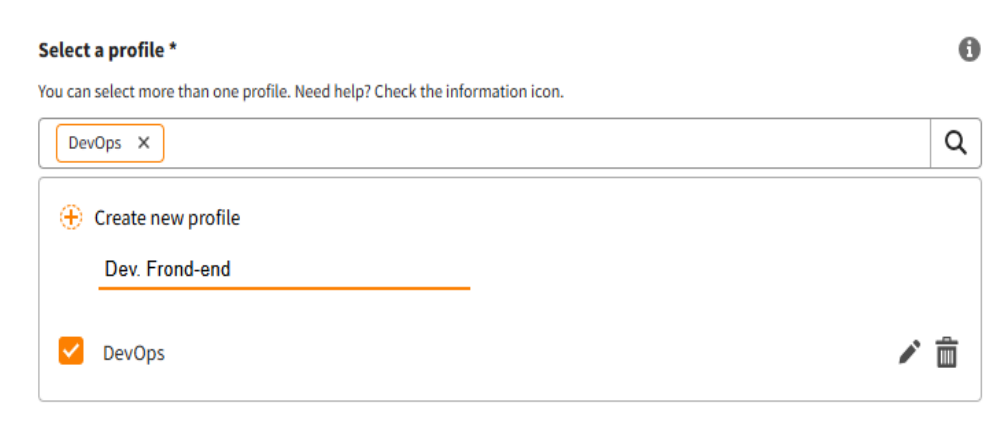
Create and Assign Profiles:
- Similar to stacks, click "Create New Profile."
- Name your profile (e.g., "Frontend Developer," "Backend API") and press "Enter."
-
Save the Setup:
- Click "Save" to finalize the configuration. You will be redirected to the homepage with a success notification.
- Alternatively, click "Cancel" to discard the setup.
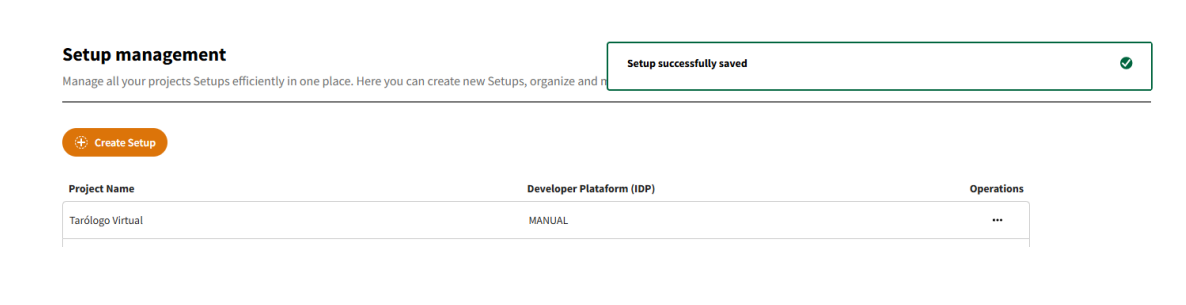
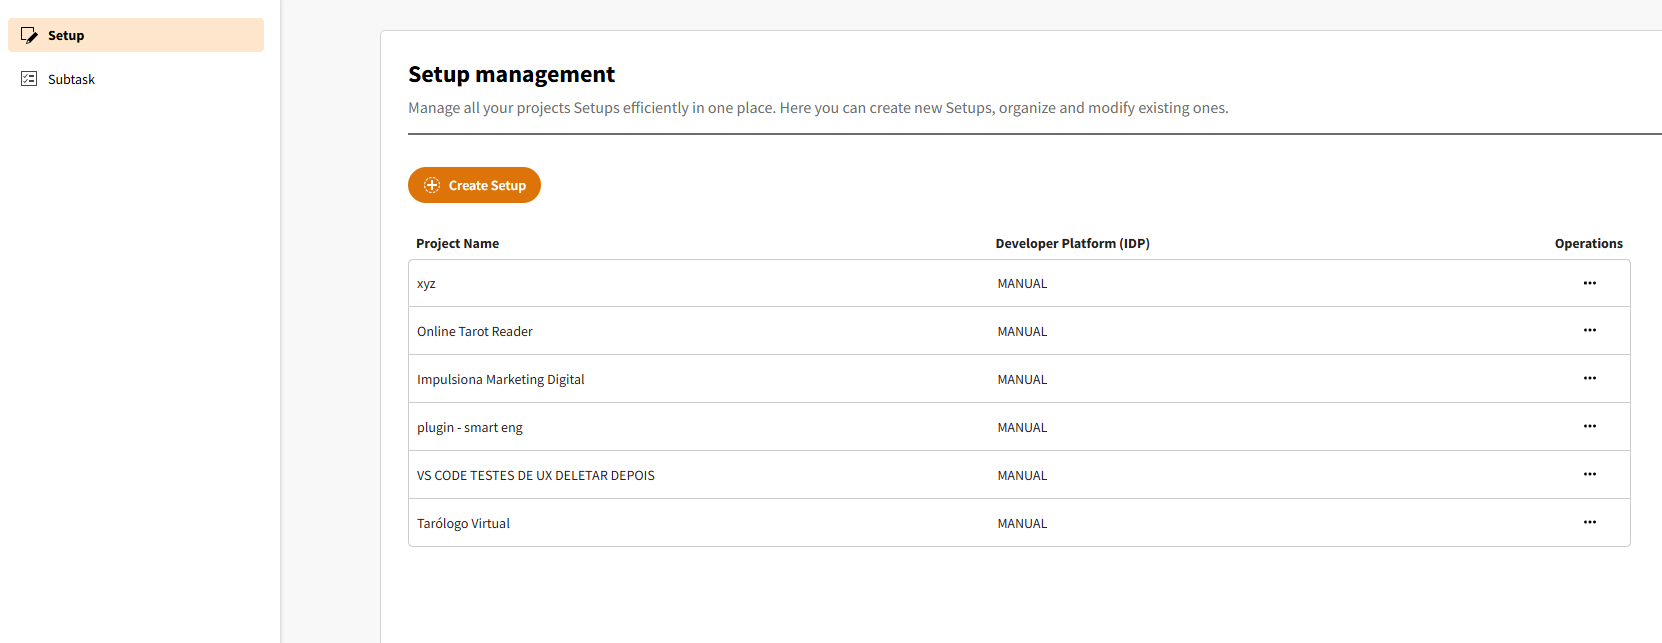
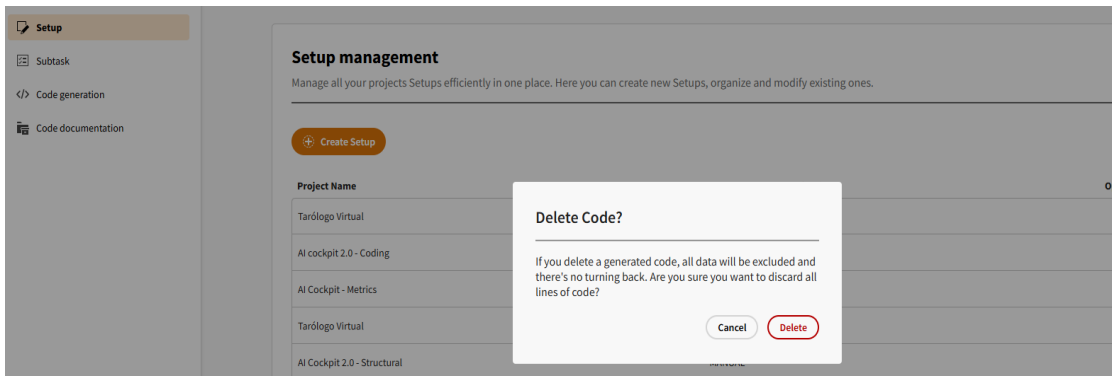
Managing Existing Setups
From the "Operations" column on the Setup listing page, you can:
- View: See the details of a saved setup.
- Edit: Modify an existing setup.
- Delete: Remove a setup after confirming in a pop-up modal.
AI-Powered Features
Once your setup is configured, you can use the following AI-driven tools.
Subtask Generation
This feature uses AI to create structured subtasks from user stories, streamlining your development workflow.
How to Generate Subtasks
-
Select a Setup: Choose the relevant setup for your task.
-
Provide a User Story:
- Manual Input: Describe the user story with enough detail for the AI to understand the context and acceptance criteria.
- Integrated Platform: If your organization is linked to a management platform, you can select a user story directly from a dropdown list.
Integration with Management PlatformsWhen a management platform is linked, the "Describe Your User Story" field becomes a dropdown menu populated with stories from the selected project, ensuring contextually relevant selections.

-
Select a Profile: Choose the profile that best fits the subtask.
-
Define Number of Results: Specify how many subtask variations the AI should generate.
-
Generate: Click "Generate" to create the subtasks.
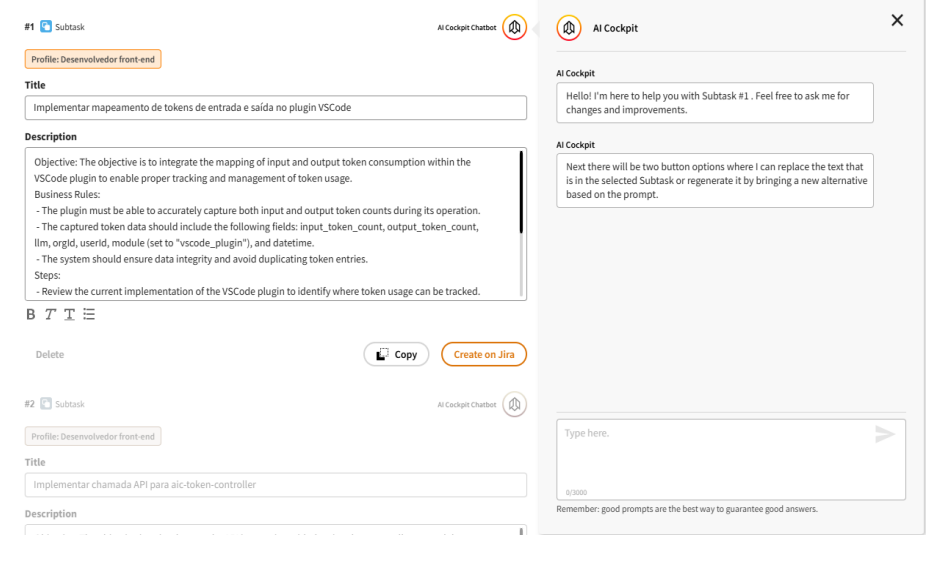
Interacting with Generated Subtasks
The AI will produce titles and descriptions for the subtasks. You can:
- Edit Formatting: Adjust the text formatting.
- Copy: Copy the description to your clipboard.
- Delete: Remove any unwanted results.
- Create on Board: If integrated with a management platform, a button will appear to create the subtask directly on your board.
- Chatbot: Use the integrated chatbot to refine the results or ask for new suggestions.